
Fine-Tuning BERT for Sentiment Analysis on Airline Twitter Data Using PyTorch and Transformers
Natural Language Processing, PTIT , Department of Computer Science, 2024
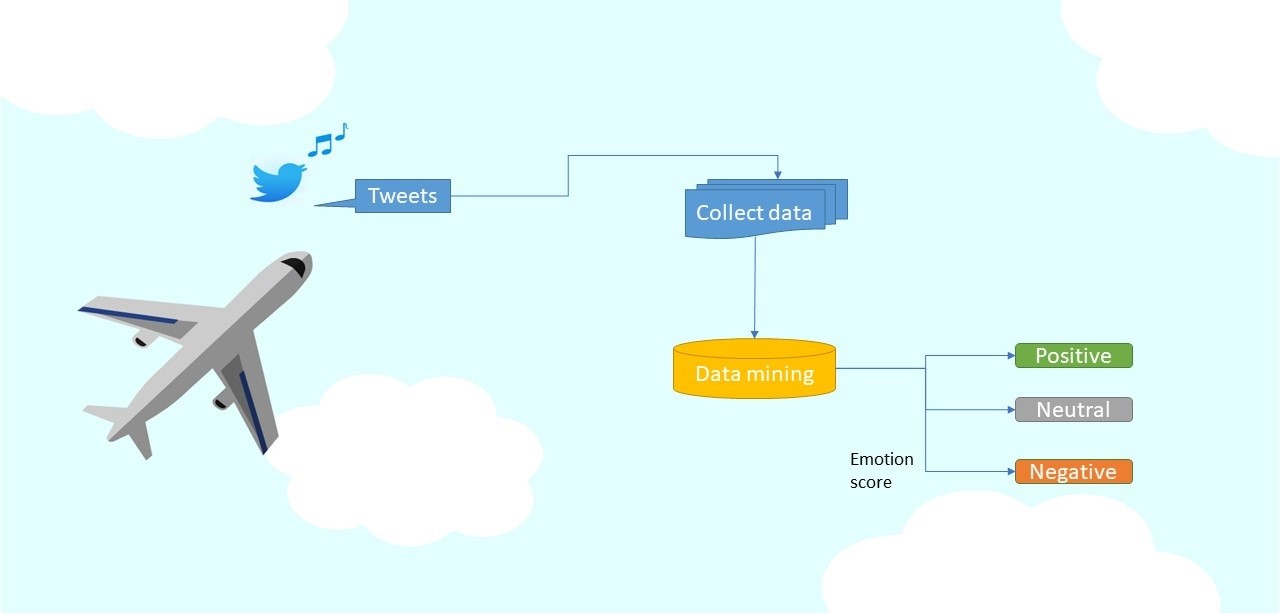
“Source Code - Github.”
Steps
Load the Data
import pandas as pd

data_path = '/content/drive/MyDrive/NLP/Tweets.csv'
df = pd.read_csv(data_path)
df.head()
Here, we use pandas, a powerful data manipulation library, to load the data into a DataFrame:
pd.read_csv(data_path)Reads the CSV file containing Twitter data from the specified path in Google Drive and loads it into a DataFrame calleddf.df.head()This command displays the first few rows of the data, giving a quick overview to confirm the data loaded correctly and to inspect column names and sample values.
In this context, Tweets.csv likely contains tweets from customers with corresponding sentiment labels. The file should have at least two columns, one for tweet text and one for sentiment (positive, negative, or neutral).
Install Required Libraries
!pip install transformers torch
This command installs external libraries directly in Colab
- Transformers This library provides pretrained models and utilities for NLP tasks, including BERT, which we’ll use for sentiment analysis.
- Torch (PyTorch) A popular deep learning framework that enables easy data manipulation, model training, and GPU acceleration.
Colab allows us to install these with !pip install, so we don’t need them pre-installed on our local machine.
Preprocess the Data
from sklearn.model_selection import train_test_split
from sklearn.preprocessing import LabelEncoder

# Encode sentiment labels (use 'airline_sentiment')
le = LabelEncoder()
df['label'] = le.fit_transform(df['airline_sentiment'])
train_texts, val_texts, train_labels, val_labels = train_test_split(df['text'], df['label'], test_size=0.2)

# Reset the indices for train and validation splits to avoid KeyErrors
train_texts = train_texts.reset_index(drop=True)
val_texts = val_texts.reset_index(drop=True)
train_labels = train_labels.reset_index(drop=True)
val_labels = val_labels.reset_index(drop=True)
This step includes several essential data preprocessing operations
Label Encoding
LabelEncoder()fromsklearnconverts text labels (e.g., “positive”, “negative”) into numeric labels, which are easier for models to interpret.df['label'] = le.fit_transform(df['airline_sentiment'])Creates a new columnlabelwhere sentiment text labels in theairline_sentimentcolumn are converted to numbers (e.g., positive -> 0, negative -> 1, neutral -> 2).
Train-Test Split
- We split the data into training (80%) and validation (20%) sets using
train_test_split. The training set is used to train the model, while the validation set helps to evaluate performance. train_texts, val_texts, train_labels, val_labelsSplits the tweet text data (df['text']) and the encoded sentiment labels (df['label']) into separate training and validation datasets.
- We split the data into training (80%) and validation (20%) sets using
Resetting Indices
reset_index(drop=True)After splitting, the indices are reset to ensure each split has a sequential index. This avoids any index-related errors in later processing.
Tokenize and Prepare for BERT
from transformers import BertTokenizer

tokenizer = BertTokenizer.from_pretrained('bert-base-uncased')
train_encodings = tokenizer(train_texts.to_list(), truncation=True, padding=True, max_length=128)
val_encodings = tokenizer(val_texts.to_list(), truncation=True, padding=True, max_length=128)
BERT requires text to be tokenized into specific token IDs. Here’s what happens in this step
Loading the BERT Tokenizer
BertTokenizer.from_pretrained('bert-base-uncased')Loads a pretrained BERT tokenizer. The ‘bert-base-uncased’ tokenizer transforms text to lowercase and tokenizes it in a way compatible with the BERT model.
Tokenizing Text
train_encodingsandval_encodingsTokenizes both training and validation texts.- Padding & Truncation Sets each text to a uniform length (128 tokens). Shorter texts are padded, while longer texts are truncated to ensure consistency. This is necessary because BERT models require fixed-length inputs.
Convert to PyTorch Datasets
import torch

class SentimentDataset(torch.utils.data.Dataset):
    def __init__(self, encodings, labels):
        self.encodings = encodings
        self.labels = labels

    def __getitem__(self, idx):
        item = {key: torch.tensor(val[idx]) for key, val in self.encodings.items()}
        item['labels'] = torch.tensor(self.labels[idx])
        return item

    def __len__(self):
        return len(self.labels)

train_dataset = SentimentDataset(train_encodings, train_labels)
val_dataset = SentimentDataset(val_encodings, val_labels)
PyTorch requires a dataset format compatible with its DataLoader, which feeds data to the model during training. Here we define a custom dataset class:
Custom Dataset The
SentimentDatasetclass wraps tokenized data and labels in a way that’s compatible with PyTorch.__getitem__Retrieves a dictionary of tokenized data (self.encodings) and the corresponding label (self.labels).__len__Returns the number of samples in the dataset.
Creating Datasets
train_datasetandval_datasetare instances ofSentimentDatasetfor training and validation, respectively. They store both tokenized text and labels, enabling easy batch loading for training.
Fine-tune BERT
from transformers import BertForSequenceClassification, Trainer, TrainingArguments

# Load BERT model for sequence classification with num_labels based on unique classes
model = BertForSequenceClassification.from_pretrained('bert-base-uncased', num_labels=len(df['label'].unique()))

# Define training arguments
import os
os.environ["WANDB_DISABLED"] = "true"

training_args = TrainingArguments(
    output_dir='./results',
    num_train_epochs=3,
    per_device_train_batch_size=8,
    per_device_eval_batch_size=8,
    warmup_steps=500,
    weight_decay=0.01,
    logging_dir='./logs',
    logging_steps=10,
    report_to="none"
)

# Initialize Trainer
trainer = Trainer(
    model=model,
    args=training_args,
    train_dataset=train_dataset,
    eval_dataset=val_dataset
)

trainer.train()
Loading the BERT Model
BertForSequenceClassificationloads a BERT model tailored for sequence classification tasks.num_labelsThe number of unique labels (sentiment classes) is set here to ensure the model has the correct output size.
Training Arguments
TrainingArgumentsDefines various parameters for training, such asnum_train_epochsThe number of training cycles.batch_sizeThe number of samples per batch.weight_decay,warmup_steps,logging_stepsControl the optimization and logging process.
WANDB_DISABLEDDisables Weights and Biases logging (if not needed).
Trainer
TrainerA high-level API for model training and evaluation. It simplifies the training loop and integrates with Hugging Face’s models and datasets.trainer.train()Initiates training, with the model learning to classify tweet sentiments based on the labeled data.
Evaluate the Model
eval_results = trainer.evaluate()
print("Evaluation Results", eval_results)
This step evaluates the model on the validation dataset, returning metrics like accuracy and loss. These results help assess the model’s performance and generalization to unseen data.
Define a Prediction Function
import torch

# Set device (GPU if available, otherwise CPU)
device = torch.device("cuda" if torch.cuda.is_available() else "cpu")
model.to(device)

def predict_sentiment(text, model, tokenizer):
    # Tokenize the input text
    inputs = tokenizer(text, return_tensors="pt", truncation=True, padding=True, max_length=128)
    inputs = {key: val.to(device) for key, val in inputs.items()}  # Move inputs to the same device as the model

    # Perform prediction
    with torch.no_grad():
        outputs = model(**inputs)
    # Get the predicted class (

index of the max logit)
    predictions = torch.argmax(outputs.logits, dim=1)
    # Convert prediction back to label
    label = le.inverse_transform(predictions.cpu().numpy())[0]  # Move predictions to CPU before converting
    return label
- Device Setup If a GPU is available, the model and data are processed on the GPU for faster computation.
- Tokenizing Text The input text is tokenized and padded/truncated to a fixed length.
- Prediction The model predicts the class by generating logits (raw scores) and selecting the class with the highest score.
- Label Conversion The numeric prediction is converted back to the original sentiment label using
LabelEncoder.
Test the Prediction Function
# Sample texts to test
test_texts = [
    "The flight was fantastic! Really enjoyed the experience.",
    "I am very disappointed with the airline service.",
    "The delay was unacceptable, but the staff were very apologetic and helpful."
]

# Run predictions
for text in test_texts:
    sentiment = predict_sentiment(text, model, tokenizer)
    print(f"Text: {text}\nPredicted Sentiment: {sentiment}\n")
This section provides test sentences to validate the model’s predictions. By passing each sentence through predict_sentiment, we can see how the model interprets new text based on its training. Each prediction is printed with the corresponding text, showing the sentiment (e.g., “positive,” “negative”) that the model assigns to each statement.